Delete an Envelope
Safely remove an envelope from your file.
Overview
When you delete an envelope that contains transactions or child envelopes, Principal Plan needs to know where to move those items. The Delete Envelope dialog asks you to select a destination envelope before the deletion proceeds.
When It Appears
The dialog appears only when the envelope being deleted is not empty -- it has transactions assigned to it, or it has child envelopes nested inside it. If the envelope is empty (no transactions and no children), a simple confirmation prompt appears instead and no destination is needed.
Using the Dialog
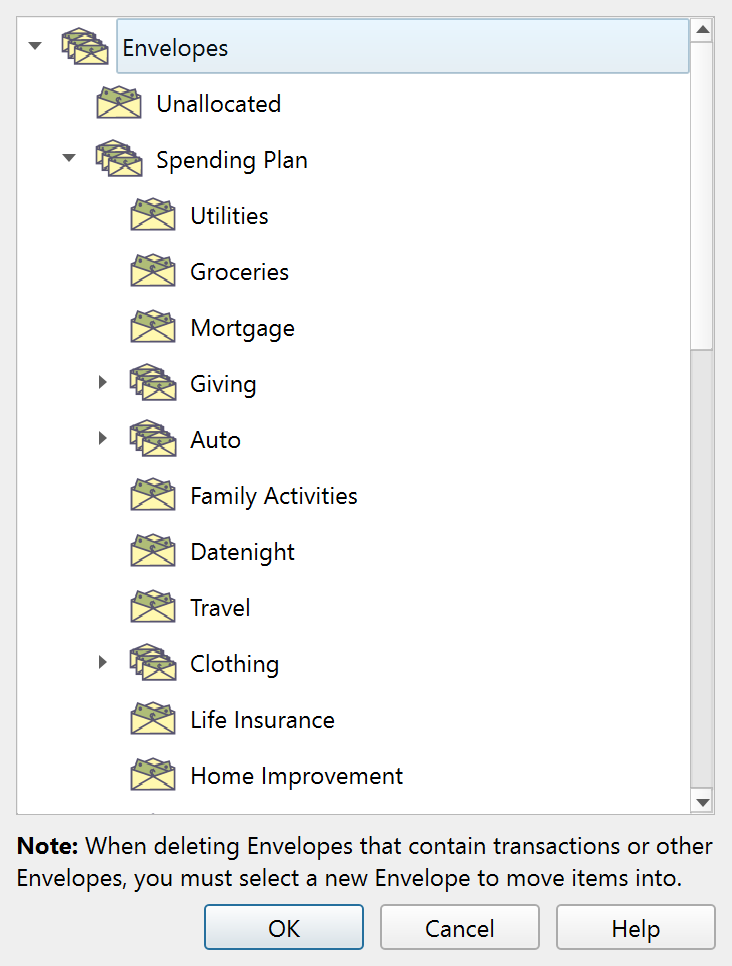
The dialog shows a tree view of your full envelope hierarchy. Click an envelope to select it as the destination for the items being moved, then click OK. You can also double-click an envelope to select it and confirm in one step.
A note at the top of the dialog explains: "When deleting Envelopes that contain transactions or other Envelopes, you must select a new Envelope to move items into."
All transactions currently assigned to the deleted envelope will be reassigned to the destination envelope. Any child envelopes will be moved under the destination envelope.
Allowed Destination Envelopes
Choose a destination envelope before clicking OK. The destination must be different from the envelope being deleted, and it cannot be one of that envelope's descendants.
The root envelope cannot be deleted. If you try to delete it, Principal Plan shows a warning and cancels the operation before this dialog opens.
Buttons
| Button | Description |
|---|---|
| OK | Moves items to the selected envelope and deletes the original. |
| Cancel | Cancels the deletion. |
| Help | Opens this help topic. |
Note: The entire help system is available as a single Markdown file suitable for teaching your favorite AI agent to be your personal Principal Plan expert. Download